Are you interested in adding a Mailchimp email signup form to your WordPress site?
Mailchimp is a top email marketing platform that enables you to create and manage an email list, send emails, and set up automated campaigns. By incorporating a Mailchimp form into your WordPress website, you can expand your subscriber list and establish a devoted audience.
Although Mailchimp offers a form builder that lets you create an email signup form from your Mailchimp dashboard, these forms are with limited design and insufficient functionalities for growing your email list.
Introducing MailOptin Optin Form Solution
For effective list-building, consider MailOptin, a dedicated optin form builder and one of WordPress’s best email marketing tools.
With its extensive features, you can easily create attention-grabbing Mailchimp forms. Customize form fields and appearance, and add conditional logic with MailOptin.
It also offers display rules and configurations, giving you control over when and where Mailchimp forms appear to your users. MailOptin perfectly matches Mailchimp, allowing you to easily capture leads from your WordPress site and send data to your Mailchimp account.
MailOptin is compatible with a variety of email marketing software, including Salesforce, Microsoft Dynamics 365, Drip, AWeber, ConvertKit, MailerLite, Constant Contact, GetResponse, Sendy, Campaign Monitor, ActiveCampaign, Brevo (Sendinblue), Gist, Klaviyo, Sendlane, Mailster, Vertical Response, Mailjet, HubSpot, Ontraport, Moosend, Zoho CRM, Zoho Campaigns, Keap Max Classic (Infusionsoft), Omnisend, Benchmark Email, SendFox, SendGrid Email Marketing, GoDaddy Email Marketing, CleverReach.
How To Create a Mailchimp WordPress Form
Step 1: Install and Activate the MailOptin Plugin
To get started with MailOptin, first, install the plugin from your WordPress dashboard. Before doing so, purchase a valid license plan from the MailOptin website.
Once you’ve made your purchase, you’ll receive an email confirmation containing a download link for the plugin zip file and your license key. Alternatively, you can also download the plugin from your account page on the MailOptin website.
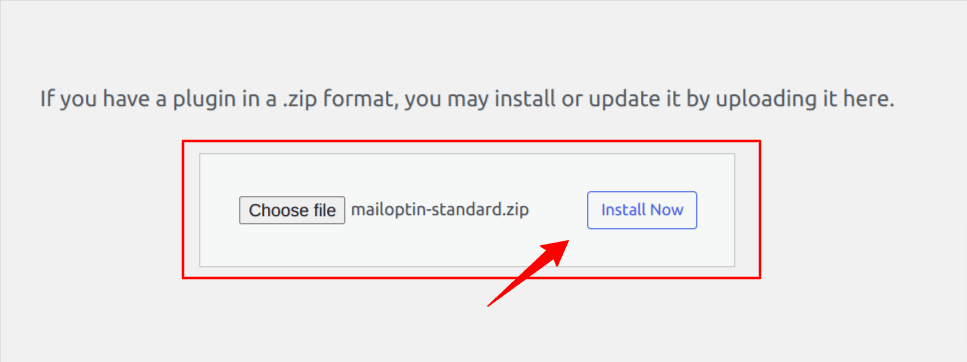
After downloading the plugin, log in to your WordPress admin dashboard and go to the Plugins page. Click on the “Add New” button and then on “Upload Plugin”.
Upload the zip file and install and activate the plugin on your WordPress site. To activate the plugin, enter the license key sent to your email.
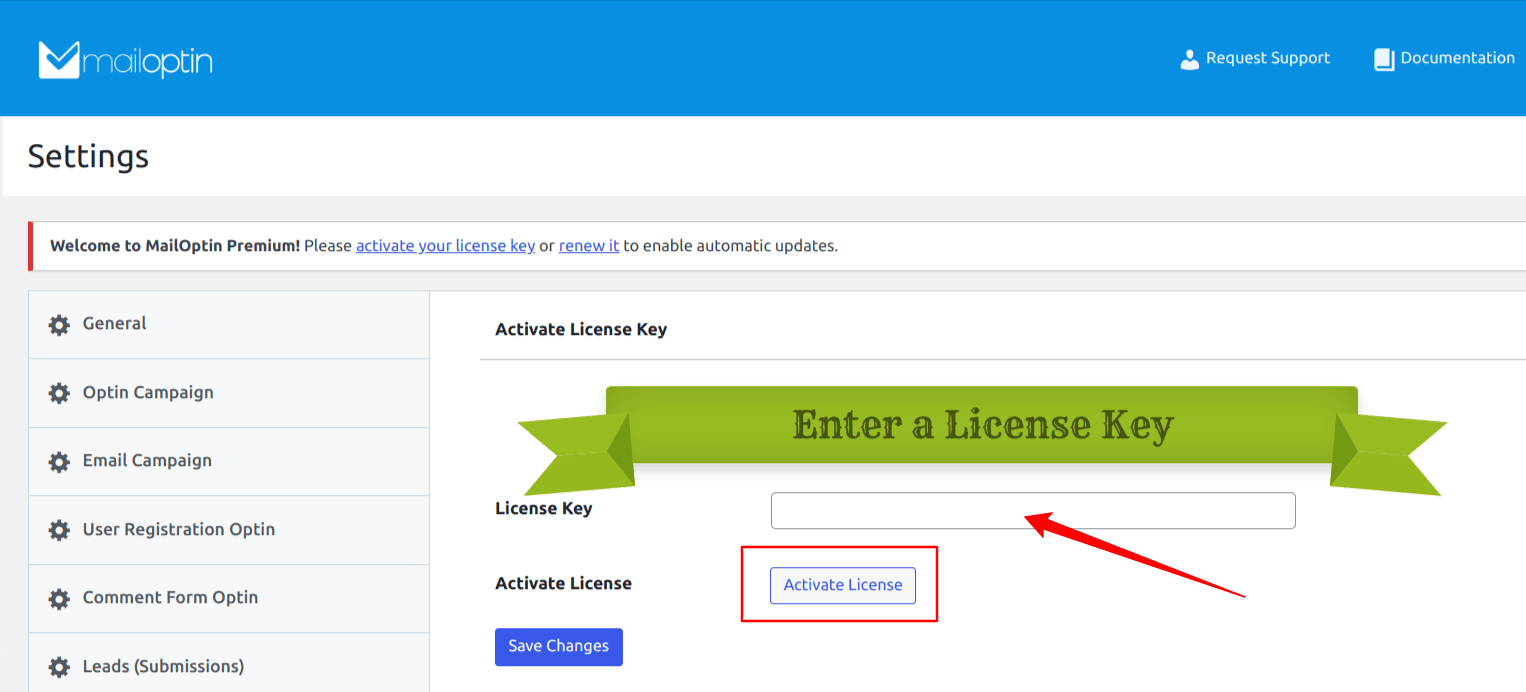
Once the plugin is activated, we can create our optin forms.
Step 2: Connect Mailchimp to WordPress using MailOptin
If you want to store the contact information of visitors who sign up for your popup subscription form on your WordPress website in your Mailchimp account, you need to start by creating a Mailchimp account.
Visit the Mailchimp website and select the free or paid plan that best suits your needs. To link your Mailchimp account with MailOptin, you will have to generate a Mailchimp API key.
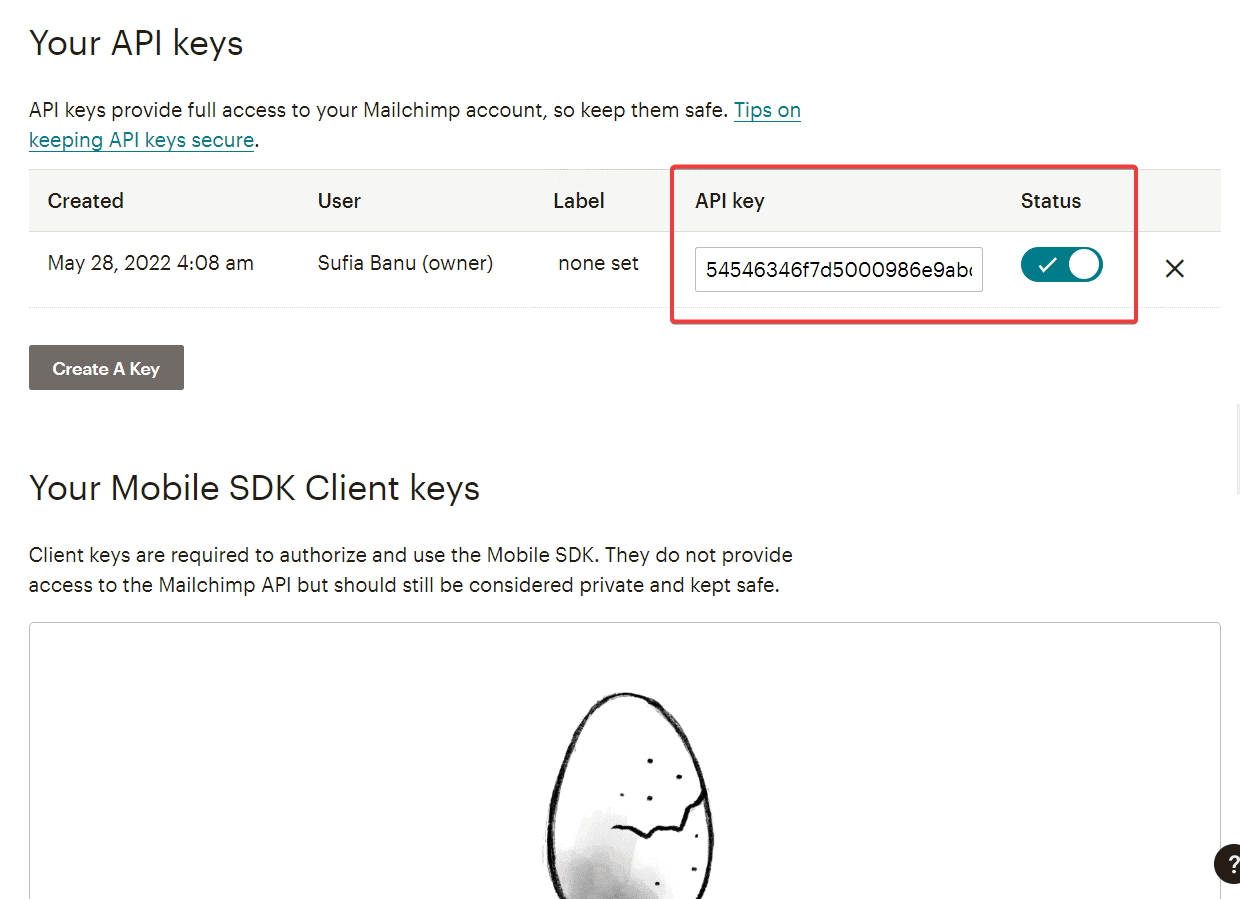
To do this, log in to your Mailchimp account, click on Account, then Extras, then API keys, and finally, Create a Key. Mailchimp will generate a key that will look something like this:
Now go to MailOptin > Integrations > Mailchimp and enter the API key to establish a connection between MailOptin and Mailchimp.
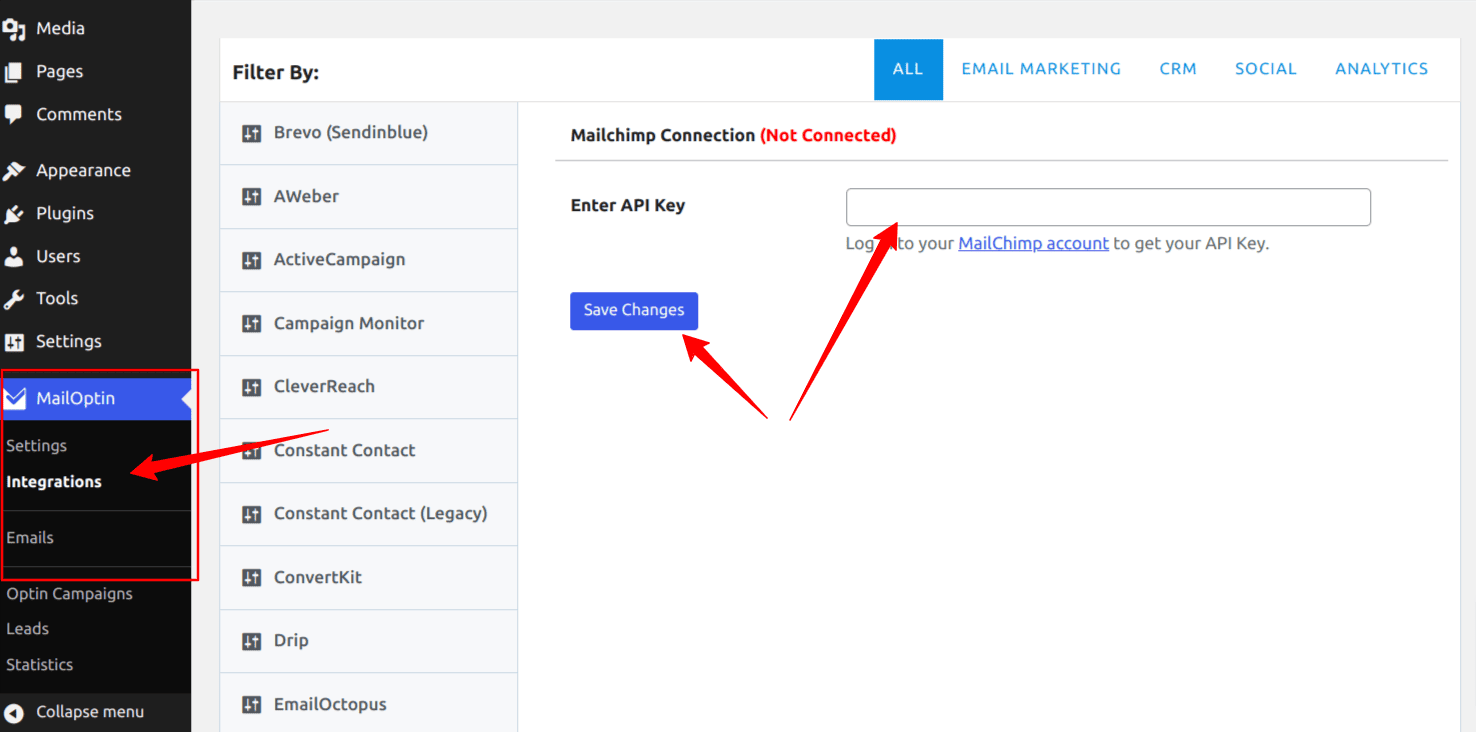
Click the” Save Changes” button, and your Mailchimp account will connect to your MailOptin plugin.
Step 3: Create a Mailchimp Signup Form in WordPress
Creating a Mailchimp form is quite simple, go to MailOptin > Optin Campaigns > Add New, then name the campaign. Next, select Lightbox type.
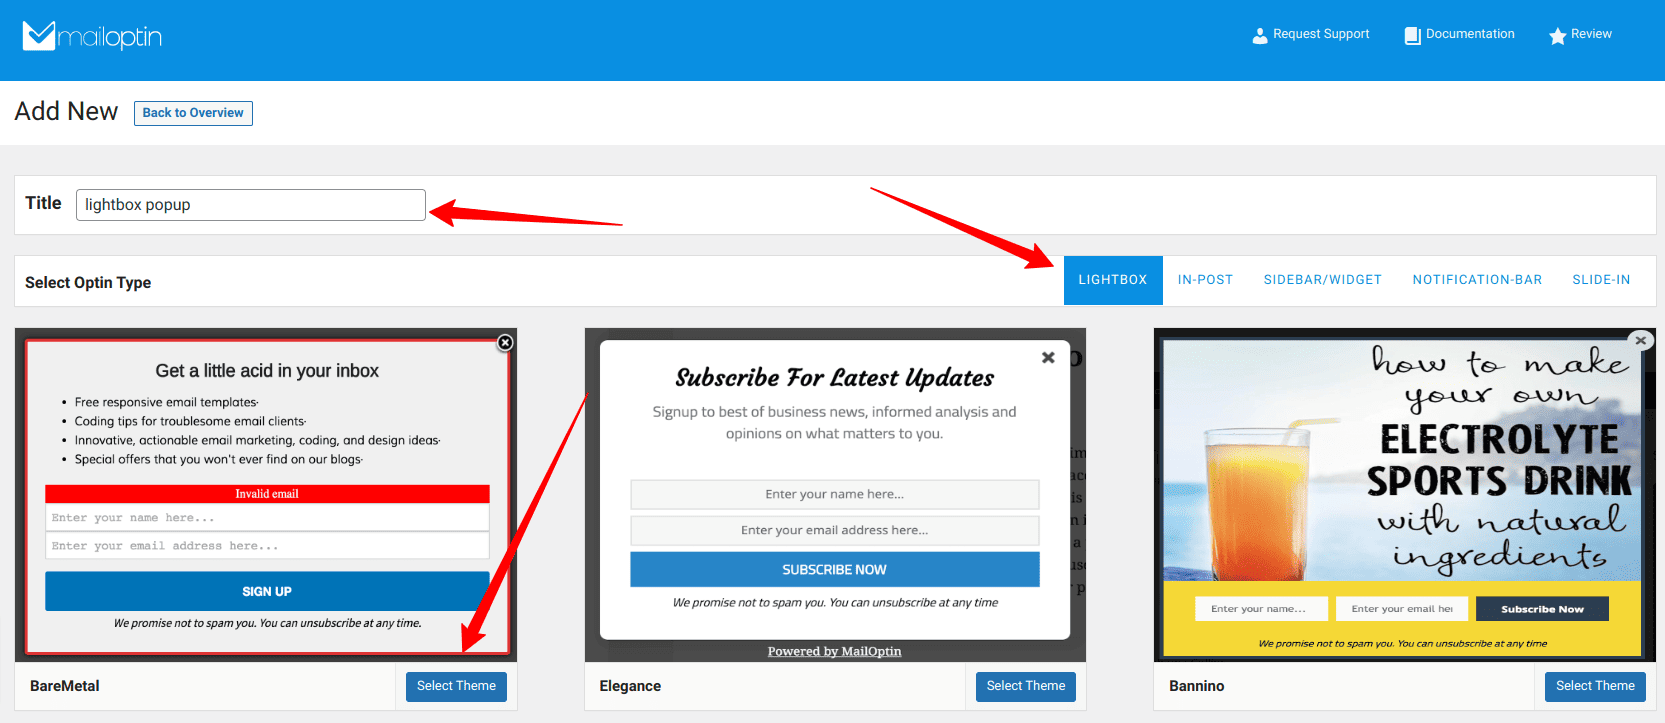
In the LightBox section, all form templates are in popup format. You can choose other options like a sidebar, slide-in, notification bar, or in-post form if you wish.
But for now, pick one from LightBox and press the “Select Theme” button on your favored template. This will lead you to the page where you can personalize the form.
After selecting a template, you will be redirected to the form builder page, where you can customize the lightbox popup email signup form to your preference.
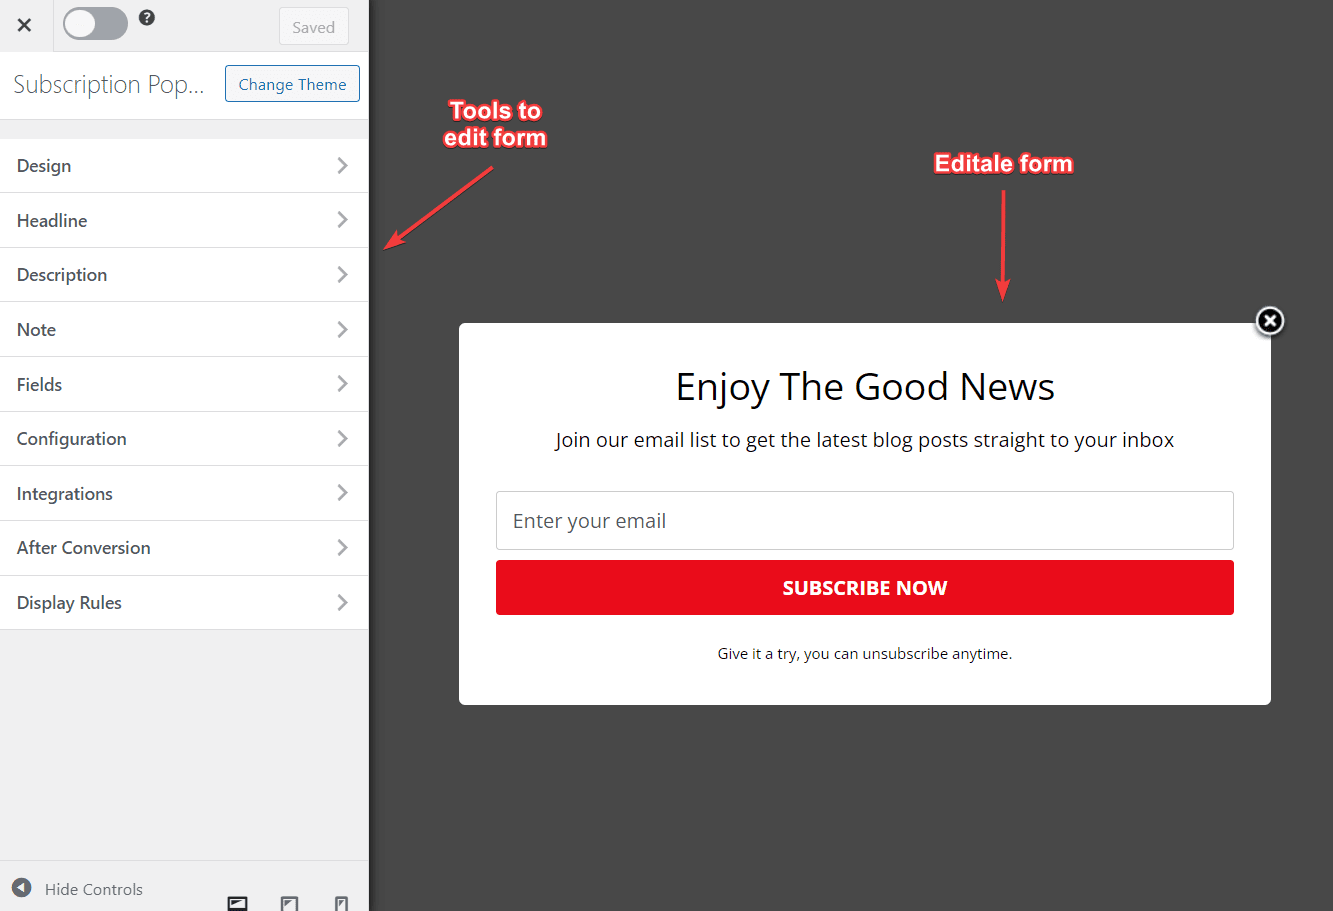
Customize the appearance and behaviors of your lightbox form using the options on the side panel.
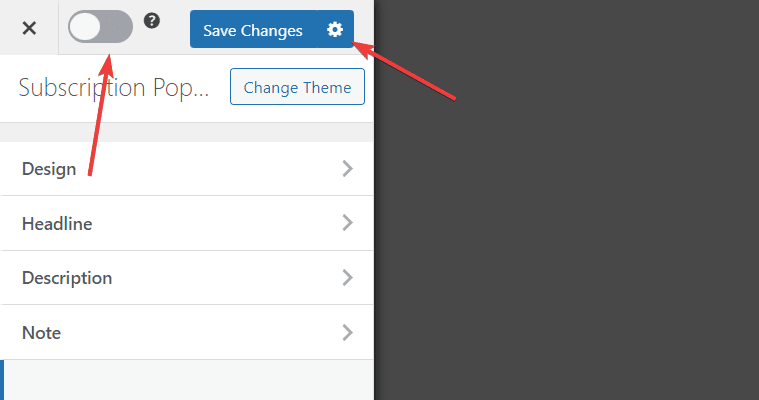
Once your form is ready, click the Save Changes button at the top of the screen to save all your changes.
Don’t forget to toggle the Activate button next to the Save Changes button to activate the form.
Step 4: Customizing your Mailchimp Email Signup Form
Customizing your email marketing forms to match your website’s theme or preference is one of the key benefits of using a tool like MailOptin. With MailOptin, you can easily access all the necessary tools to customize your forms through the side panel on the form builder page.
Let us take a quick look at some of the sections:
Design Panel
To customize your opt-in form’s background color, click on the Design tab. You can customize the typography using the Headline and Description menus and set text colors. The design section allows you to customize the popup design according to your preferences.
Headline Panel
You can customize every headline aspect for your popup in the Headline section. Below are the options available to you:
– Hide Headline: Select this option if you prefer not to display a headline.
– Headline: Using WordPress’ WYSIWYG editor, you can personalize the appearance of your headline.
– Color: You can choose a specific color for the text in your headline.
– Font Size: Different font sizes can be selected for various screen sizes.
– Font Family: You can select any Google Font to change the font family of your headline.
Description Panel
In the description section, you can tailor the subtitle or description that appears beneath the headline of your exit-intent popup.
Several options for customizing your description include font family, color, and size.
You can change the font family to match your website’s, select different sizes for different screen sizes, and adjust the color of the text. The “Description” field is where you can input the text that will be displayed.
Note Panel
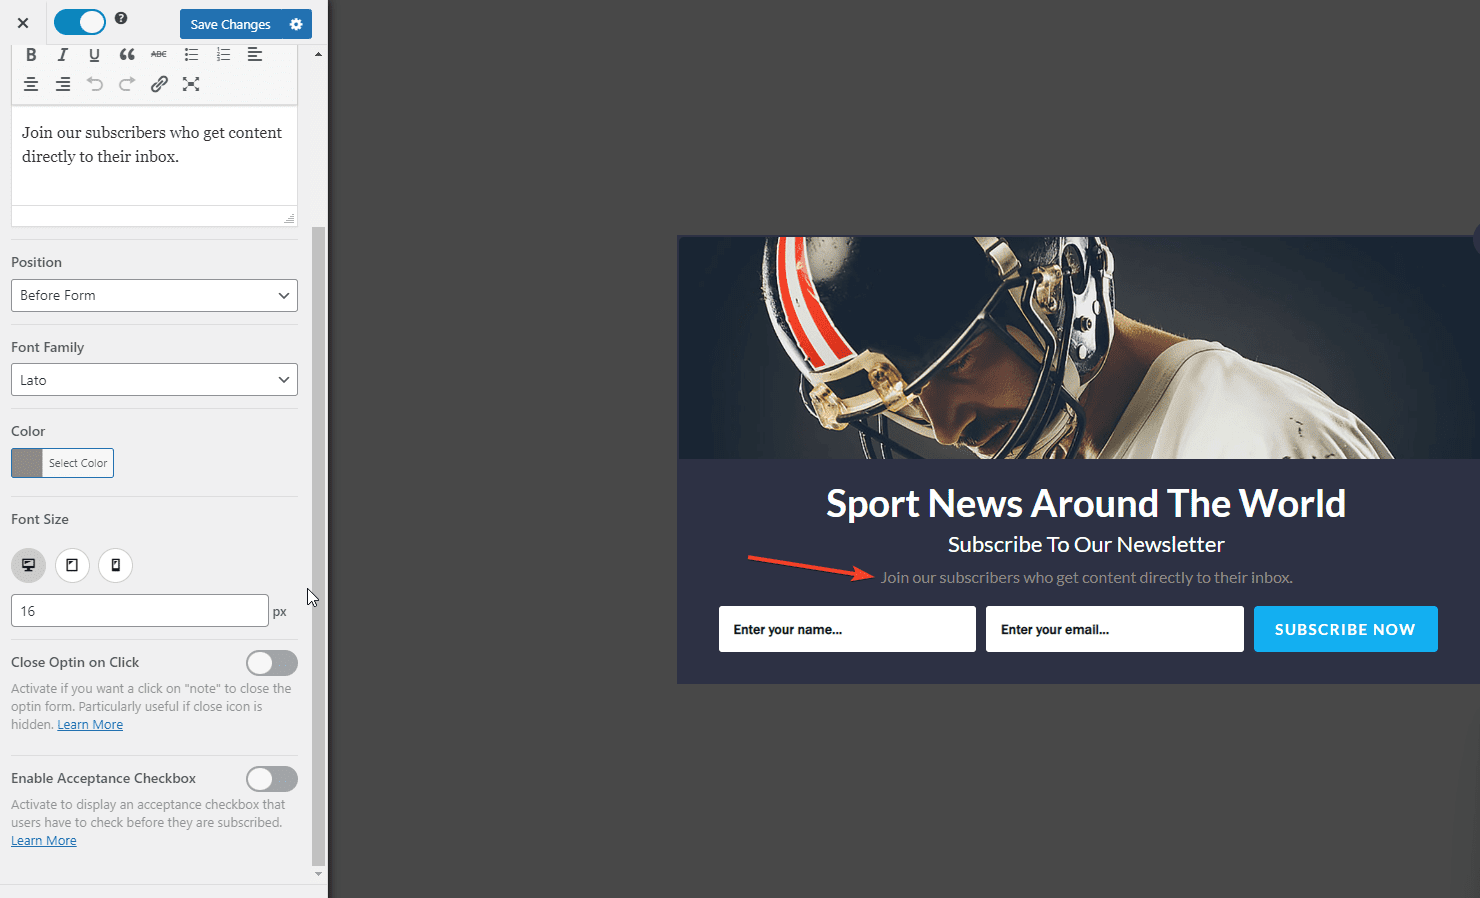
You can include content, paragraphs, or notes in the Note section. The note will be visible below the form’s description.
You can specify the position of the note before or after the form using the Position option. Additionally, you can customize the font family, color, and font size of the note text.
To create a link-based close button, you can use the Close Optin on Click option in combination with the Position option.
Moreover, you can convert the note text into a checkbox using the Enable Acceptance Checkbox option, which requires visitors to check the checkbox before signing up.
You can also look through each of the other sections on the customization panel to adjust the look and behavior of your popup.
Step 5: Integrate Your Form with Mailchimp
To keep track of your subscribers’ information through Mailchimp, you will need to connect your optin form to your Mailchimp account.
To do this, navigate to the Integrations Panel on the form builders page, select Mailchimp from the Email Provider dropdown, and choose the Mailchimp List your users will be subscribed to.
Additionally, you can turn off double opt-in, assign Mailchimp tags to your subscribers, and segment leads into Mailchimp groups.

And that is it. You have successfully connected the form to your Mailchimp account.
Step 6: Displaying the Mailchimp Form on Your Website
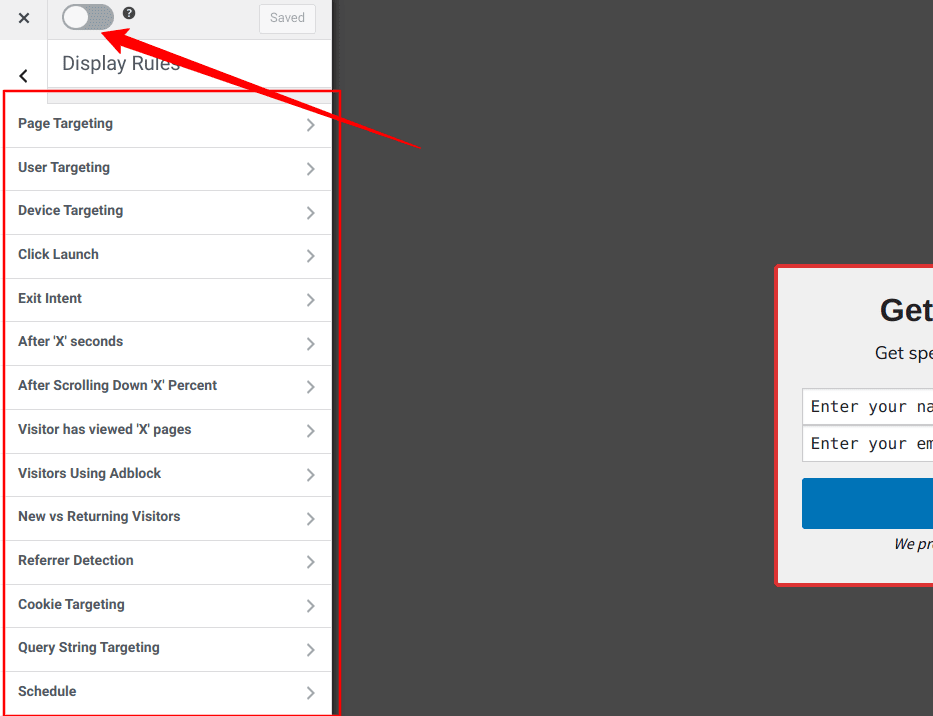
Once you’ve created and linked your form to Mailchimp, the next step is to display it on your website. To do this, head to the “Display Rules” panel.
If you’d like the Mailchimp form to appear on every page of your WordPress site, select the “Globally load optin” option. If not, you can use the page-level targeting and triggers to determine where and how the opt-in will appear on your site.
Many options are available to you, including Page targeting, Device targeting, Exit intent, and cookie targeting. With MailOptin, you have plenty of choices to customize your opt-in.
Once you have made the desired changes, remember to save them. After that, preview your website to confirm that the optin is visible. If you cannot see it, clear your website and browser cache.
Conclusion
Throughout this guide, we have covered the necessary steps to install and activate the MailOptin plugin, connect our WordPress site to Mailchimp via MailOptin, and create a customizable Mailchimp form for our website.
With the MailOptin plugin, you can create various types of opt-in forms, use content lockers, run A/B tests, detect Adblock users, and more.
I hope this guide has helped help you achieve your goal of creating a Mailchimp email signup form.