If you wish to generate revenue from your newsletter and provide unique content to your loyal followers, consider establishing a paid newsletter subscription. Utilizing the proper tools and approach, you can set up a system for your readers to subscribe and pay for premium content access.
Paid newsletters have become a widely utilized method of earning money online from email subscribers. However, using platforms such as Substack can become costly.
In this article, we’ll show you how to use ProfilePress to create a paid newsletter subscription, connect it to a newsletter service such as Mailchimp or Campaign Monitor, automatically sync subscribers’ data, and send exclusive content to the email list.
Why Create a Paid Newsletter in WordPress?
Substack-style paid email newsletters are becoming a popular and lucrative way to earn money online. They differ from traditional newsletters in offering premium, exclusive content to paying subscribers.
Starting a paid newsletter can be a standalone business venture or a supplementary source of income for your WordPress website. With a paid newsletter, you can profit directly from your writing while fostering a strong relationship with your readers.
However, using a service like Substack can be costly. Substack charges a 10% fee on all profits, which can add up over time.
Launching a paid newsletter on your WordPress site can sidestep these fees and keep more of your earnings. Additionally, using WordPress gives you greater control over the design, subscriber experience, and other aspects of your newsletter.
How To Create a Paid Newsletter Subscription in WordPress
ProfilePress is a powerful WordPress membership plugin that allows you to create and manage membership plans, user profiles, and custom registration forms.
The premium version of the plugin includes several extra features and integrations, such as the ability to connect to popular newsletter services like Mailchimp and Campaign Monitor, as well as payment gateways like Stripe, PayPal, Razorpay, and Mollie.
Let’s see how to install it on your WordPress website and use it to create a paid newsletter subscription.
1. Install ProfilePress and Connect It to a Newsletter Service
The first step is to purchase and install the premium version of ProfilePress. To do so, head over to the ProfilePress website and purchase the premium version of the plugin. You can purchase the Standard plan as it includes the ESP and payment gateway integration we need to create paid newsletter membership in WordPress.
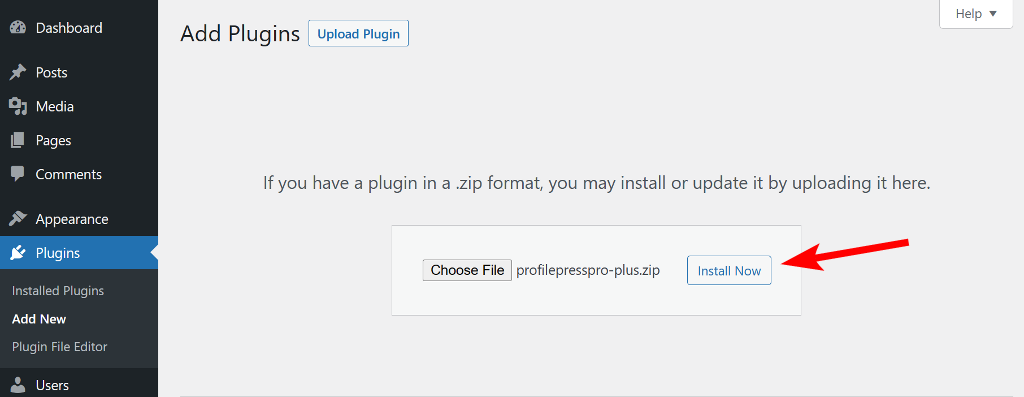
After purchasing the plugin, download the zip file to your computer. Then, log in to your WordPress dashboard and navigate to the Plugins section.
From there, click the Add New button at the top and then Upload Plugin. Choose the plugin file you just downloaded and click on Install Now. Finally, activate the plugin once the installation is complete.
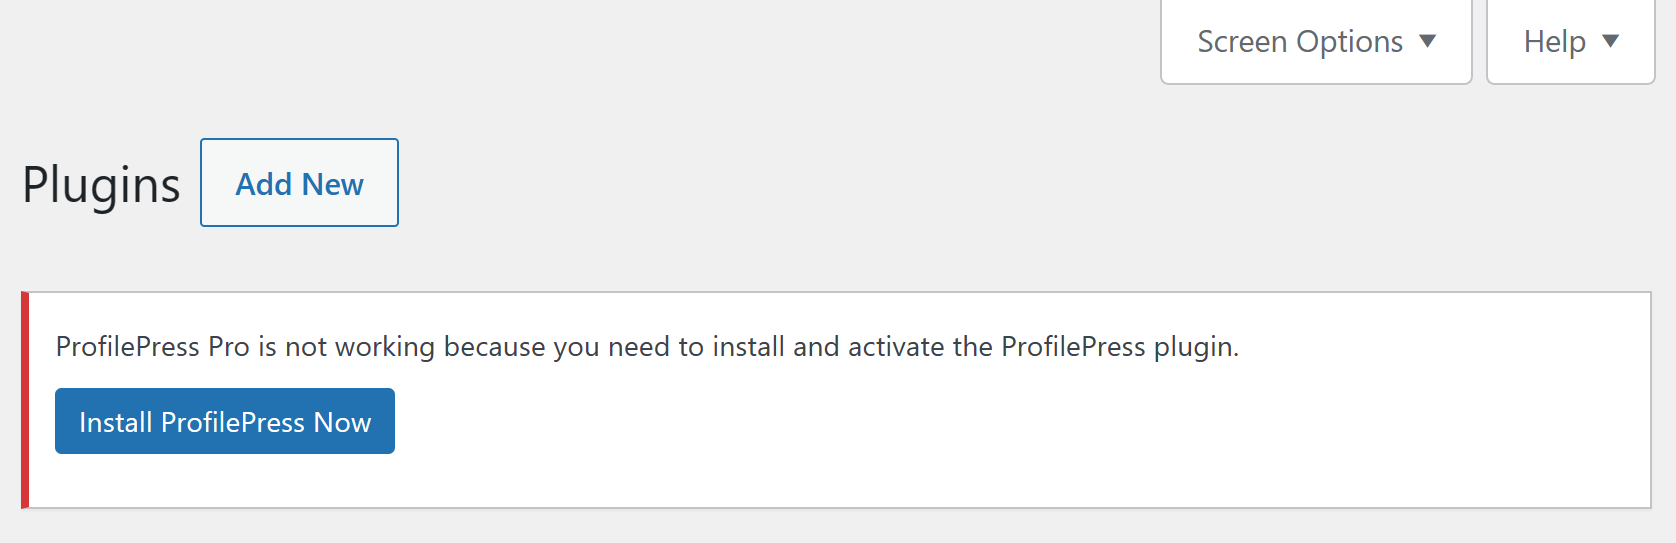
You’ll see a notice informing you that the core version of ProfilePress is also required for the plugin to work. Click the Install ProfilePress Now button to install and activate the core version of the plugin.
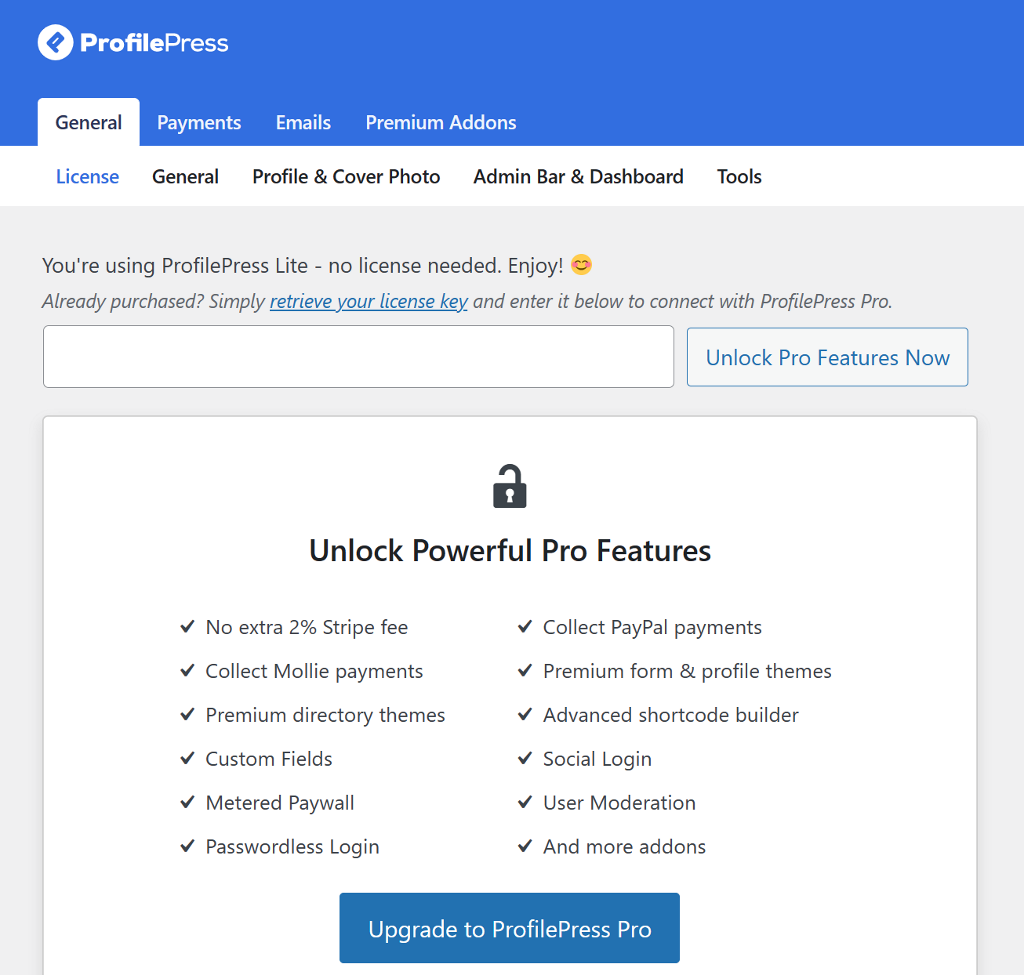
Now, we need to verify the license key to unlock the premium features of the plugin. To do so, copy the license key from your ProfilePress account and navigate to ProfilePress > Settings. Paste the license key into the box and click the Unlock Pro Features Now button.
To function correctly, ProfilePress needs to create some pages such as Checkout, Order Confirmation, User Profile, My Account, Registration, and Login.
To create these pages automatically, go to ProfilePress > Dashboard and click the Create Pages button at the top.

After these pages are created, you’ll be taken to the plugin’s settings page, where you must select the newly created page next to each name.

Once done, click the Save Changes button at the bottom.
Connect ProfilePress to an Email Newsletter Service
After setting up the plugin, the next step is to connect to an email service like Mailchimp or Campaign Monitor. For this article, we’ll demonstrate the steps for Mailchimp, but you can check out the documentation articles for Campaign Monitor.
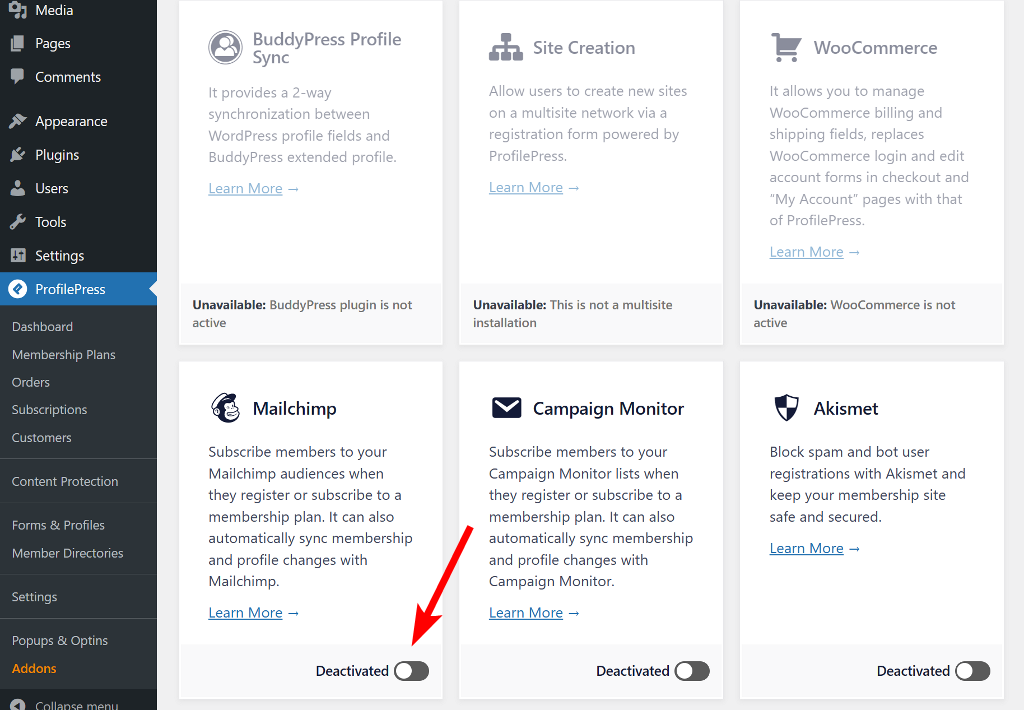
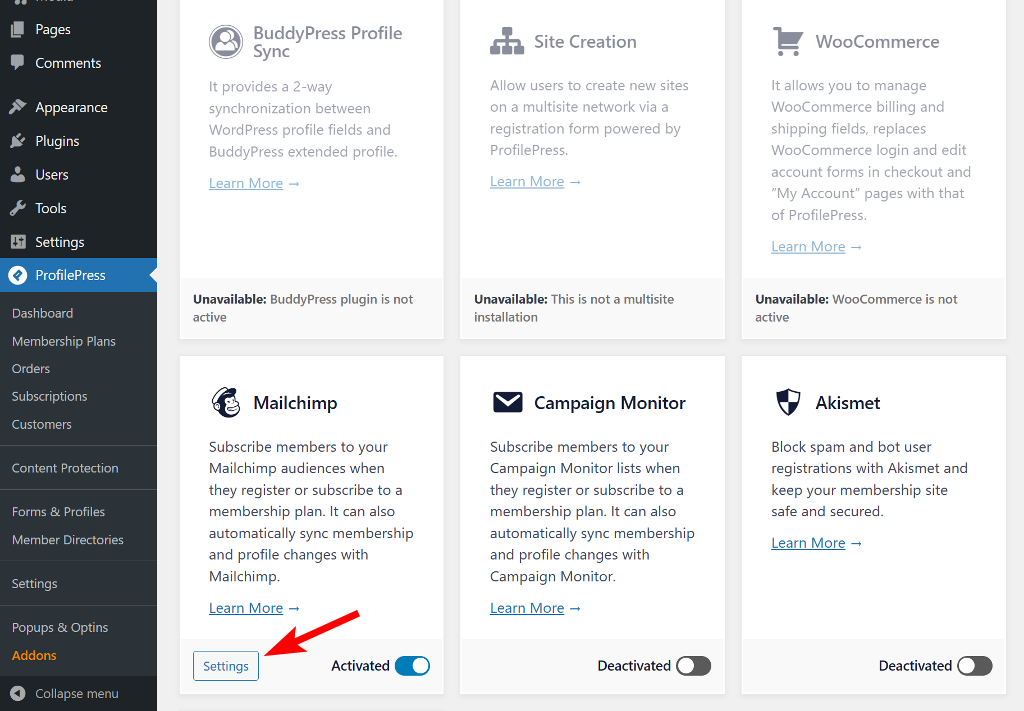
To connect ProfilePress to Mailchimp, navigate to ProfilePress > Addons and look for Mailchimp in the list. Once you spot it, shift the toggle to activate the addon.
Once activated, you’ll see a new Settings button next to the toggle. Click on it, and you’ll be taken to the Integrations tab on the Settings page.
You’ll need to connect the Mailchimp API to automatically add users who purchase your paid newsletter subscription to the Mailchimp mailing list.
If you already have your Mailchimp account API key, you can paste it into the box. If you don’t have one, click the Get it Here link below the box to navigate the Mailchimp API page (you must log in to your Mailchimp account).

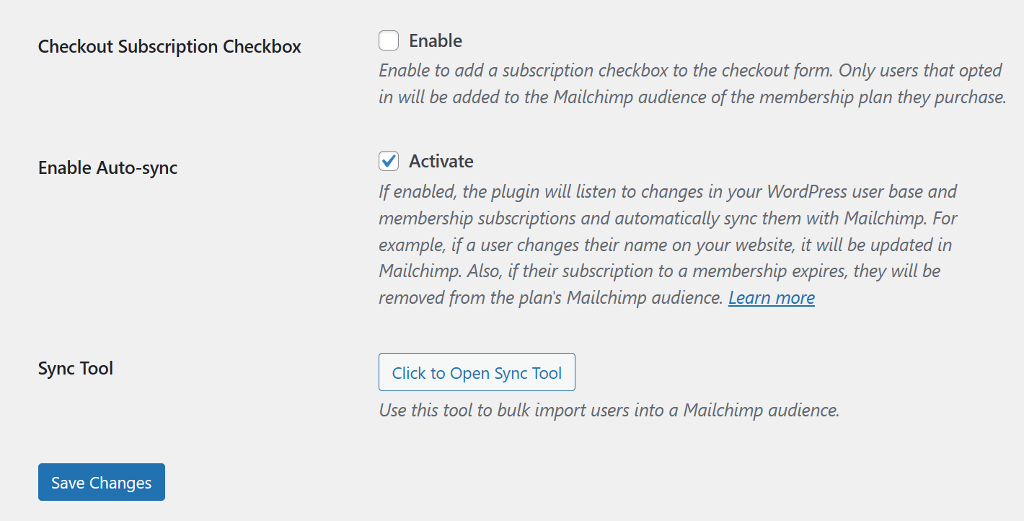
Next, leave the Checkout Subscription Checkbox unticked, as we want to add all paying members to the email list automatically.
Scroll down and check the box for Enable Auto-sync to allow the plugin to listen to changes in your WordPress user base and membership subscriptions and automatically sync them with Mailchimp.
For example, if your members or users update their profile information or change their account email address, their profile in Mailchimp will be updated to reflect the changes.
Once done, click the Save Changes button to save the API key and update changes.
Let’s now create an audience list to which the paid newsletter members will be added.
Create Paid Newsletter Audience
You’ll need to create a custom tag in your Mailchimp account to add new members to the correct list. Follow this guide to create the tag inside Mailchimp to have it appear inside ProfilePress.
Once the tag is ready, switch to your WordPress dashboard and navigate to ProfilePress > Settings > Integrations. On the Mailchimp page, click the Add New Audience button at the top and check the box for Enable Audience.
Next, enter a name and select the paid newsletter audience from the dropdown.

After that, map the fields and scroll down to select the tag we created above. Once everything is done, click Save Changes at the bottom to publish it.
Let’s now look at how to create a paid newsletter membership plan and connect it to Mailchimp.
2. Create a Paid Newsletter Subscription Plan
Creating a paid newsletter subscription plan using ProfilePress is easy. ProfilePress allows you to create multiple membership plans with different prices and access, but we’ll focus on creating a single plan.
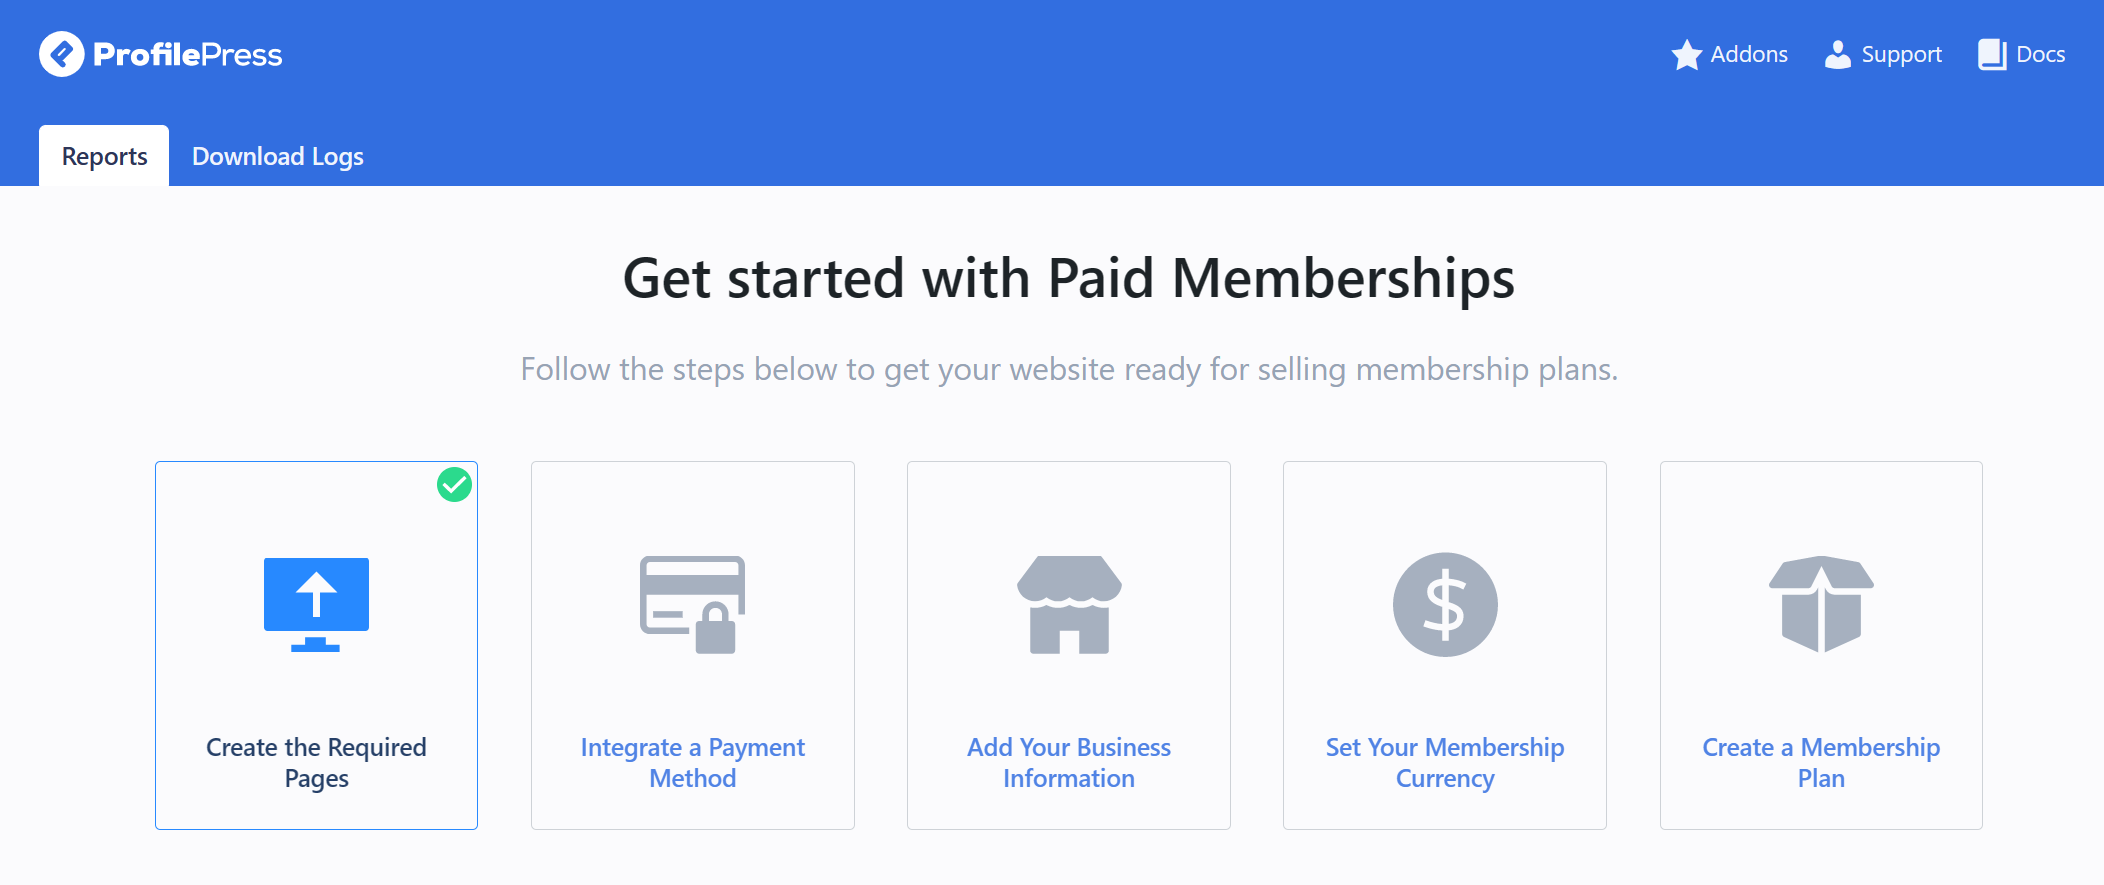
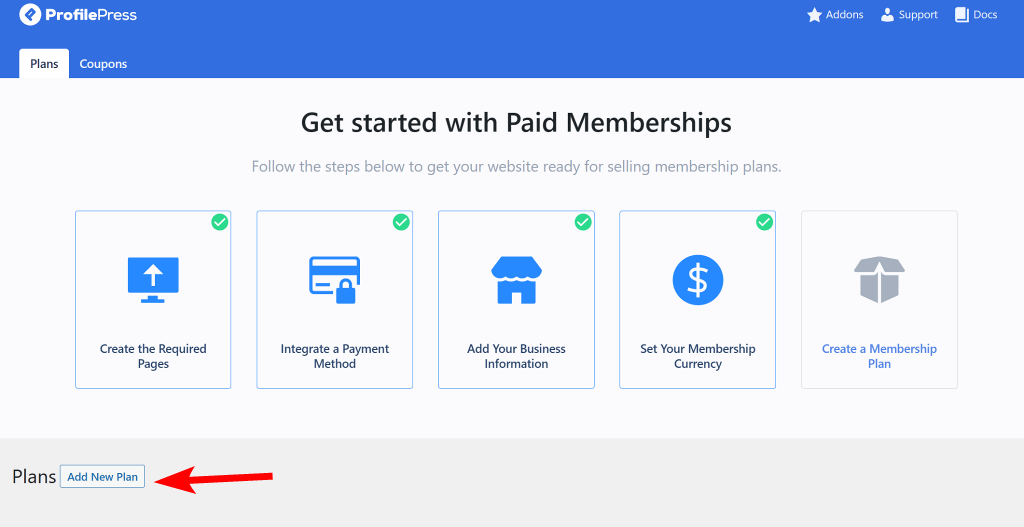
ProfilePress provides a 5-step Get Started guide in the plugin dashboard to help you set up paid newsletter membership plans on your website. To access it, navigate to the ProfilePress > Dashboard and see it at the top. We have already completed the first step, so let’s proceed to the next one.
Integrate a Payment Method
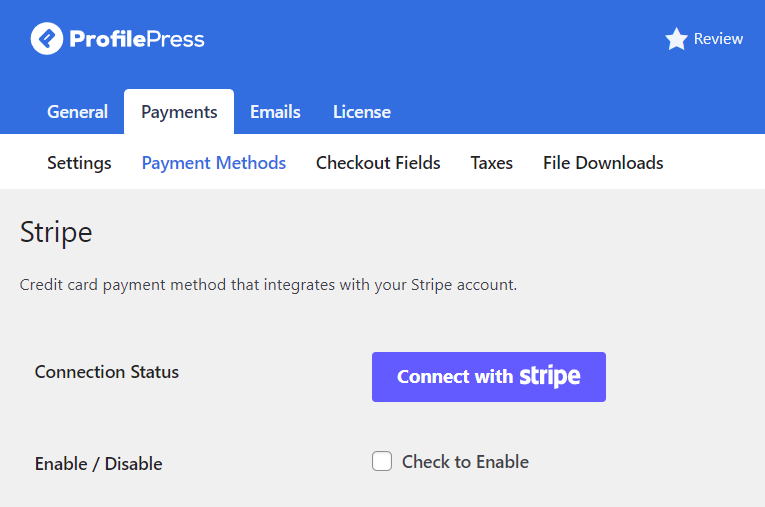
Click on the Integrate a Payment Method button to take you to the Payments page. Alternatively, you can navigate to ProfilePress > Settings > Payments to access the page. ProfilePress integrates with various payment gateways, including [ppress-payment-gateways], which are listed under Payment Methods.
Click on the Configure button next to any of the Payment Methods you want to use. In this tutorial, we will walk you through the steps for Stripe.

On the Stripe page, click the Connect with Stripe button to connect ProfilePress to your Stripe account.
You’ll be taken to Stripe.com, where you’ll be prompted to create a new Stripe account or log in to your existing one.
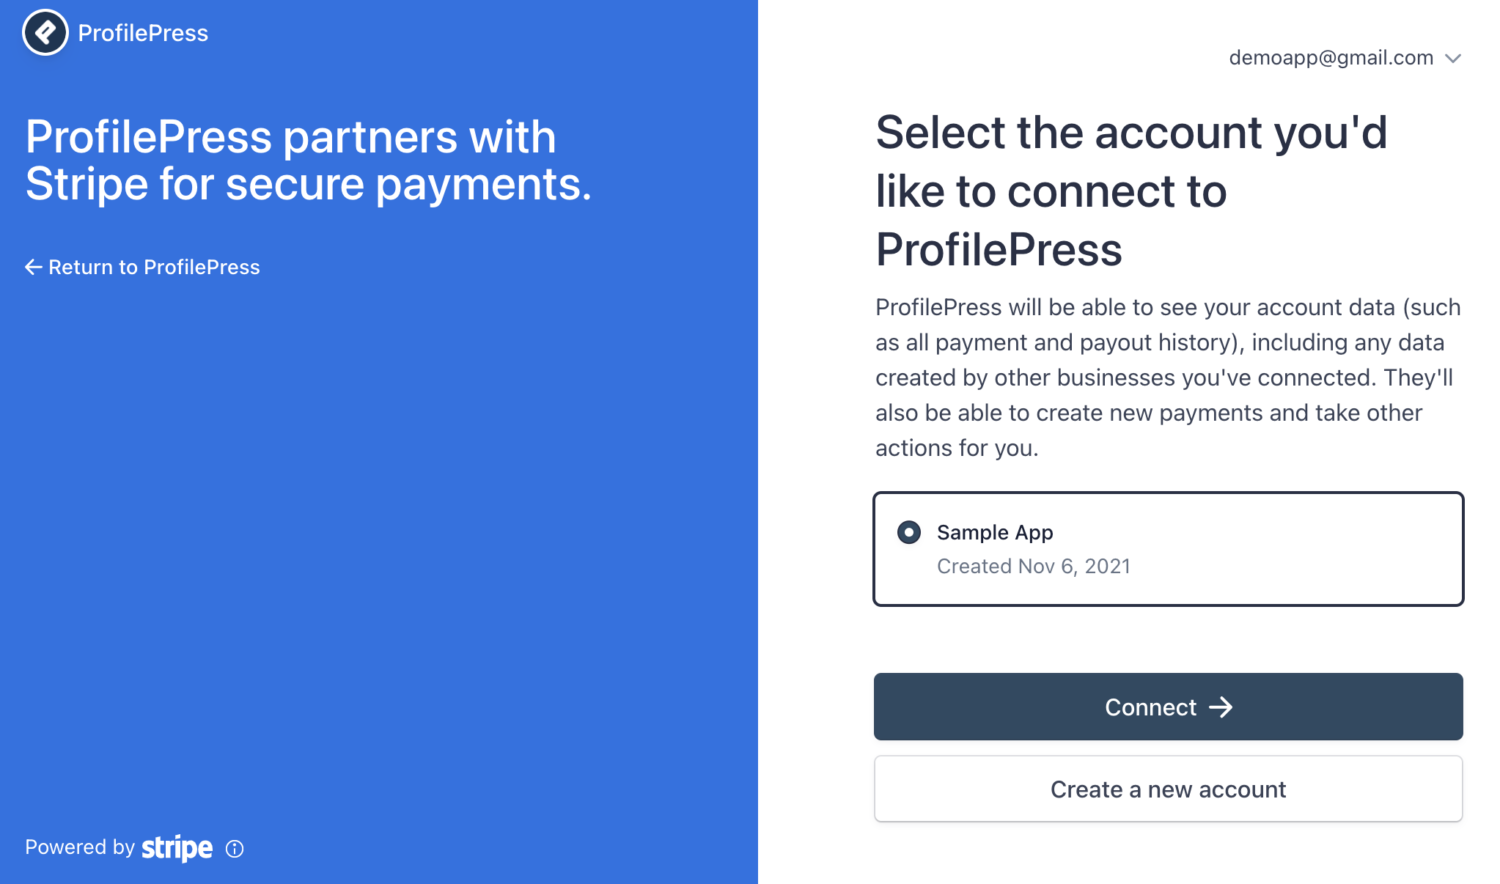
Once you complete the form, you’ll be taken back to your website.
Next, enable the payment method by checking the Enable / Disable option. You can also edit the Title and Description on the checkout page.
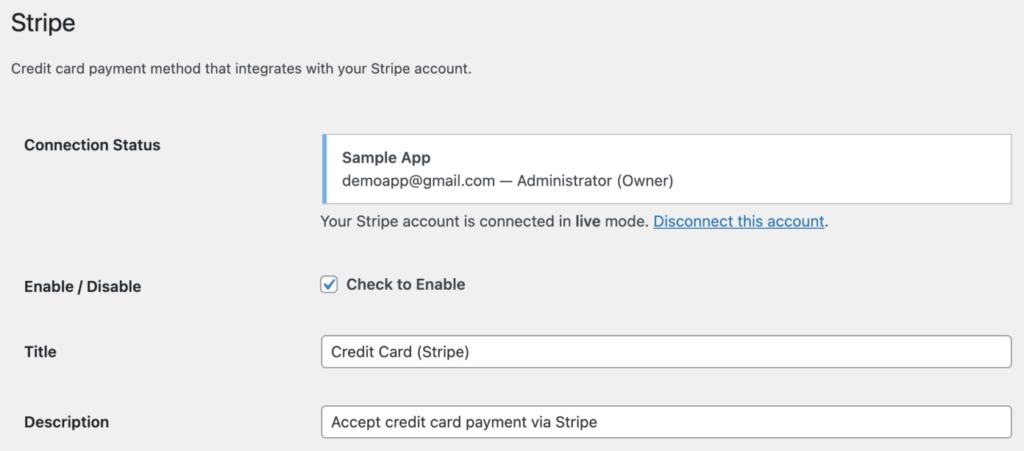
Next, we need to set up the webhook to allow ProfilePress to communicate with Stripe. You can check the documentation article on how to do it.
Add Your Business Information
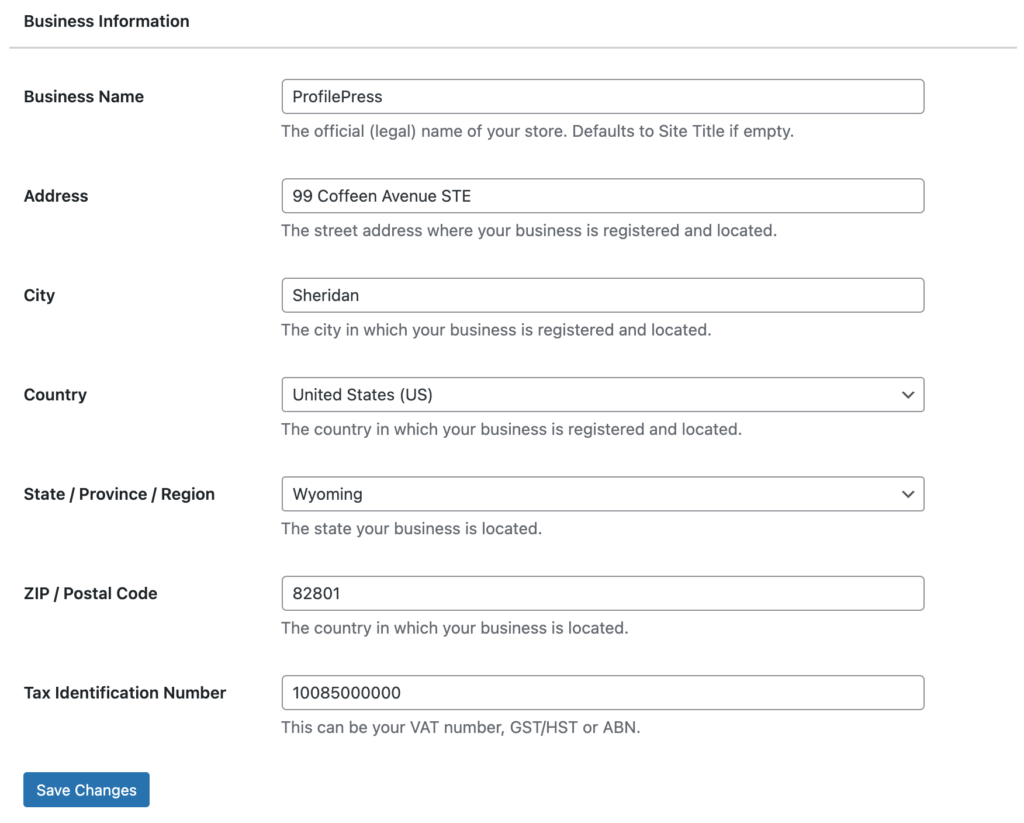
Returning to the ProfilePress dashboard page, click on the next step to add your business information.
You’ll need to provide your business name, a complete address, and the tax identification number. Once you’ve filled in all the information, click the Save Changes button at the bottom.
Go back to the dashboard page and click the next button to proceed to the next step.
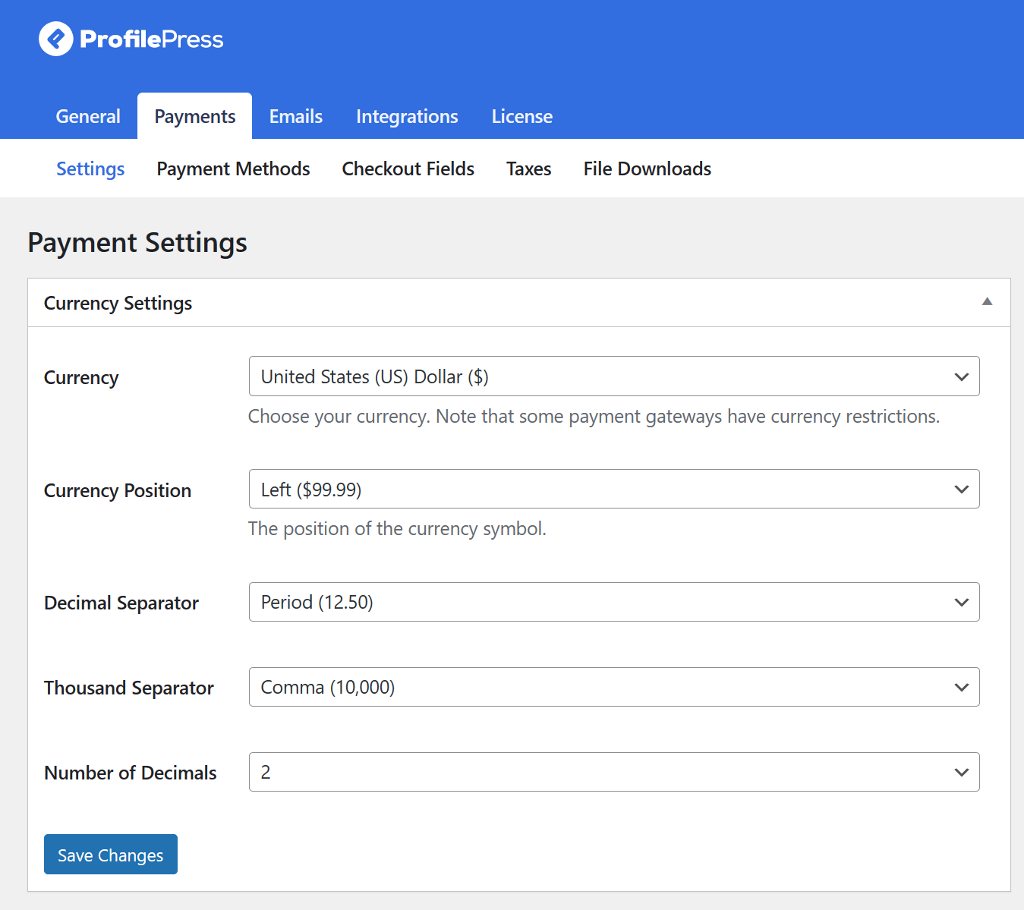
Set Your Membership Currency
With ProfilePress, you have the flexibility to choose your preferred currency. The default currency is set to USD, but you can easily switch to any of the world’s major currencies by clicking on the dropdown menu and selecting your preferred option. You can also set the currency position, decimal and thousands separator.
Next, scroll down to set the checkout settings. Here, you can tick the One Time Trials option to prevent users from using the free trial of a plan multiple times. You can also edit the “Agree to Terms” checkbox text.
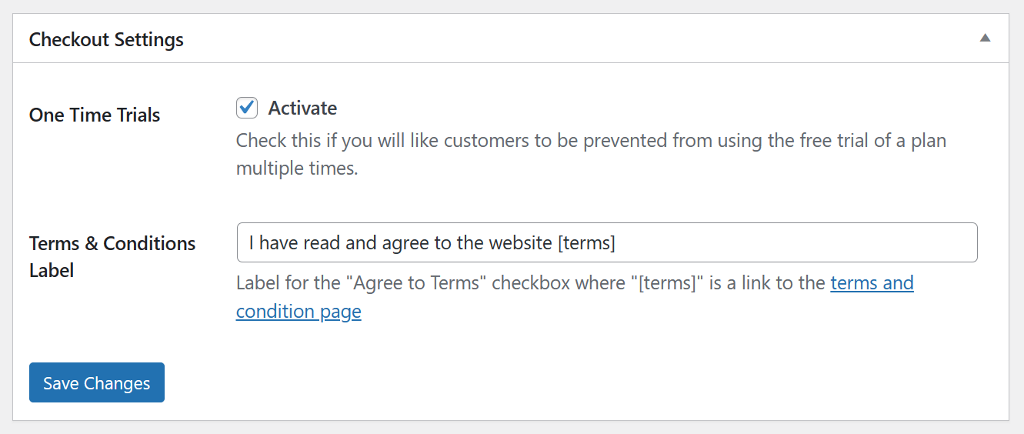
Don’t forget to save your changes and move on to the receipt settings. Here, you can disable receipt generation for free orders and specify the URL that customers will be redirected to if they click on the logo on the receipt. You can also add a thank you note or edit the receipt button label.
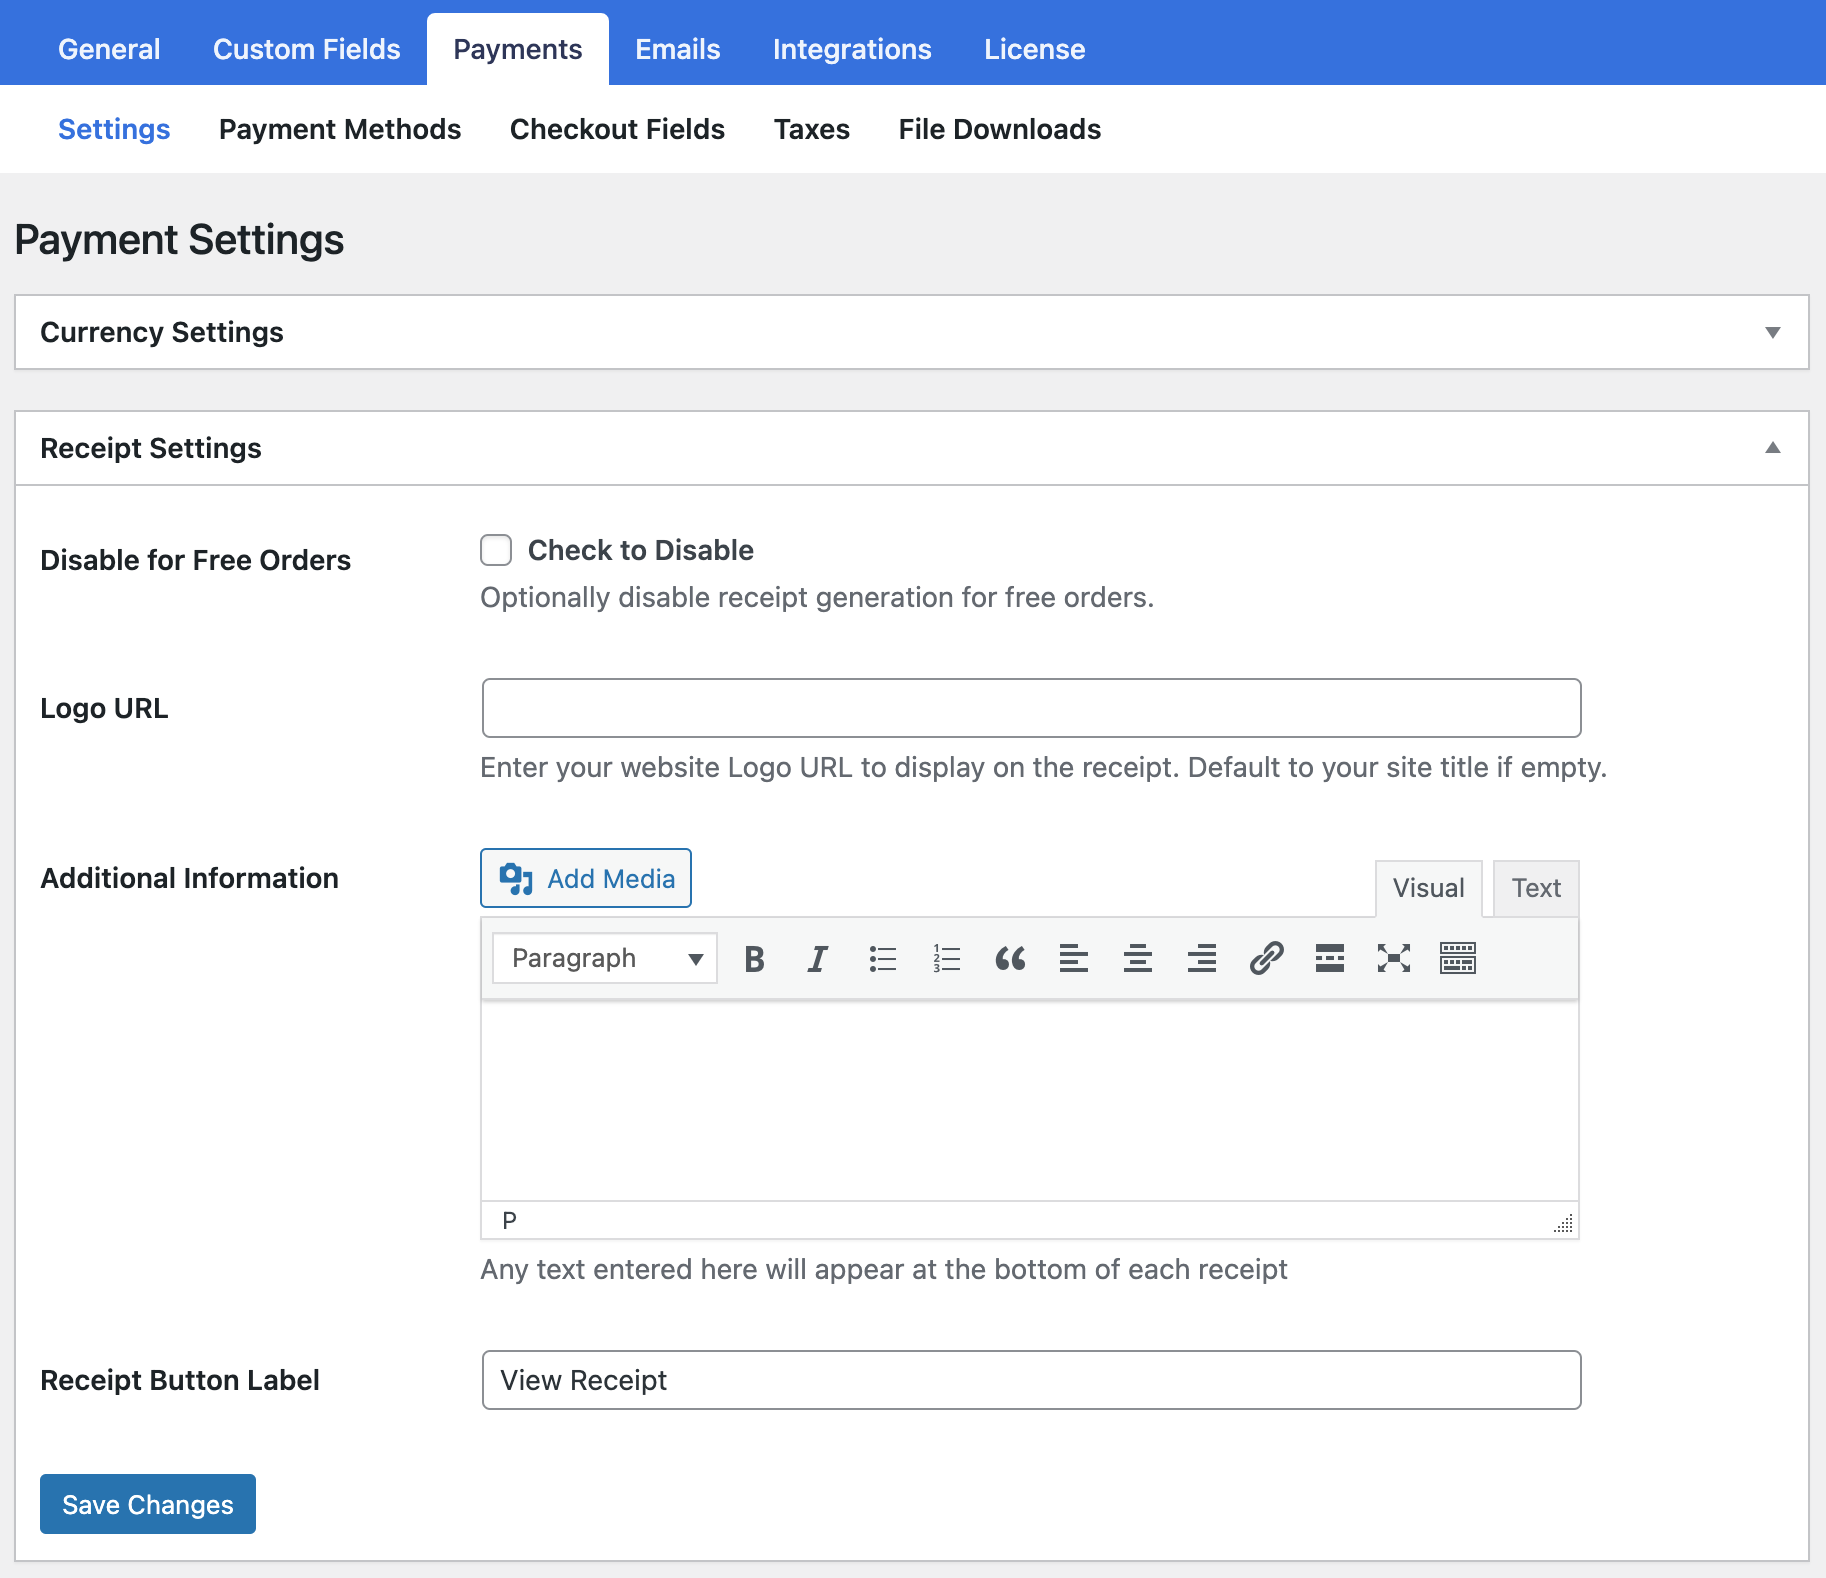
When you’re all done, click the Save Changes button at the bottom of the page. Go back to the Dashboard page to move to the next step.
Create a Membership Plan
The next step is crucial as we’ll create the membership plan for our paid newsletter. Click on the Create a Membership Plan button and then click on the Add New Plan button at the bottom.
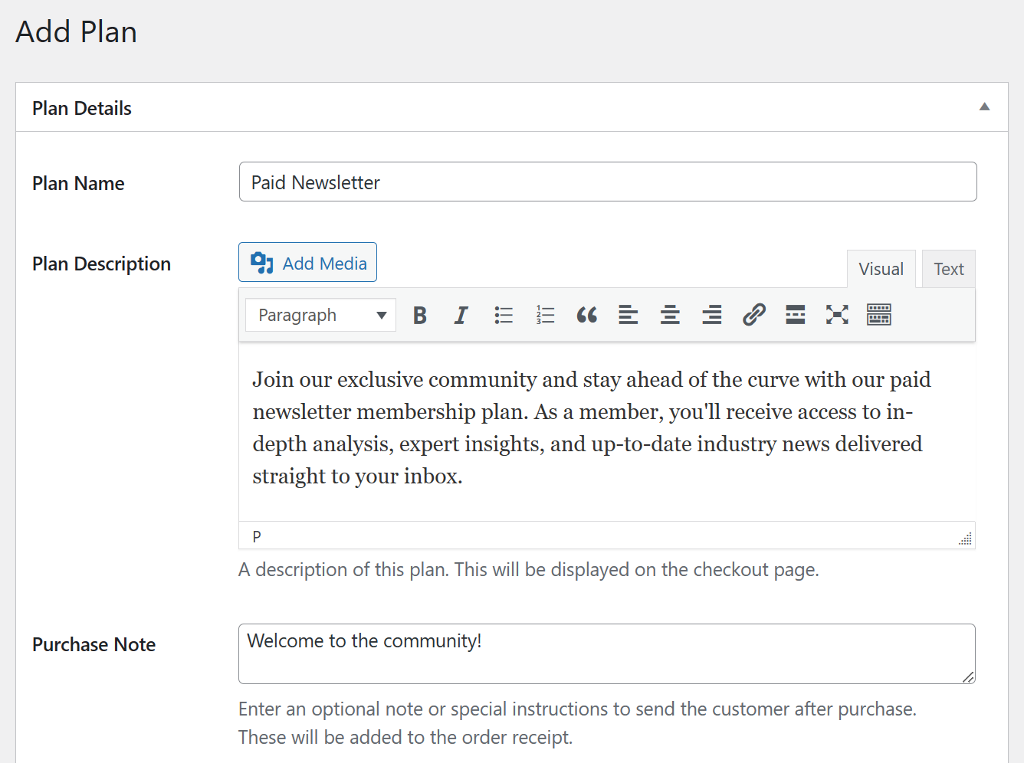
Name your plan and add a short description explaining what your paid newsletter is about. Make sure to choose a simple and self-explanatory name. You can also optionally enter a Purchase Note which is a great place to add a thank you note or usage instructions.
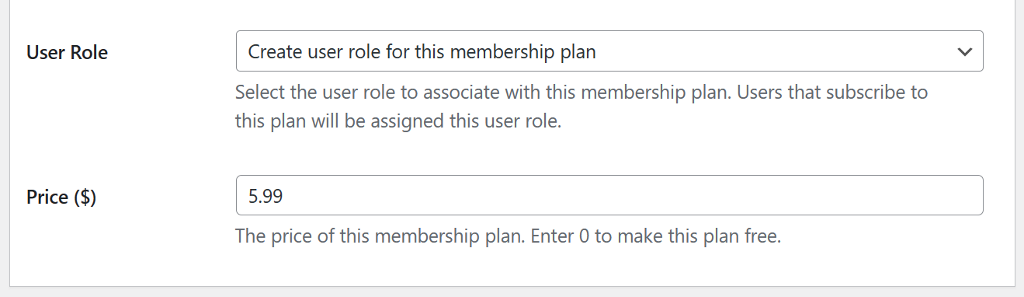
Next, select the user role that will be associated with the plan. Selecting “create user role for this membership plan” is recommended so that a new role is created and associated with the plan. This way, anyone who subscribes to this plan will have this user role assigned to them.
Finally, enter a price for your paid newsletter membership plan.
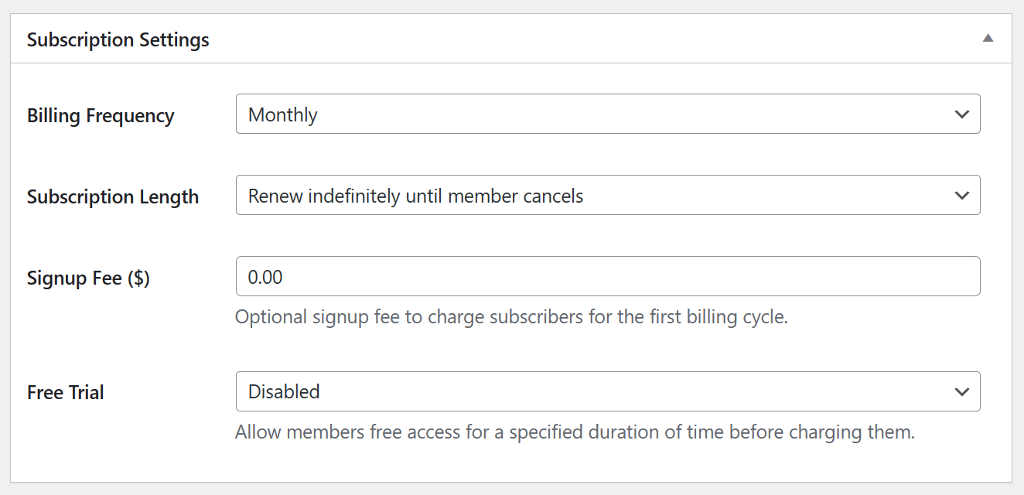
Scroll down to the next set of settings which allows you to fine-tune your subscription by setting the billing frequency and duration. You can choose from monthly, weekly, daily, quarterly, every six months, yearly, or one-time payment options for billing frequency. You can choose a fixed number of payments for the subscription duration or have it renew automatically until the member cancels. For our paid newsletter subscription, it is recommended to keep the duration to renew it automatically until the member cancels.
If you want to charge a one-time fee in addition to the membership plan price, you can set that in the Sign-up fee box.
If you want to offer your members or customers a free trial to your paid newsletter, you can set the duration before they are charged. Don’t want to offer a free trial? You can have the option disabled.
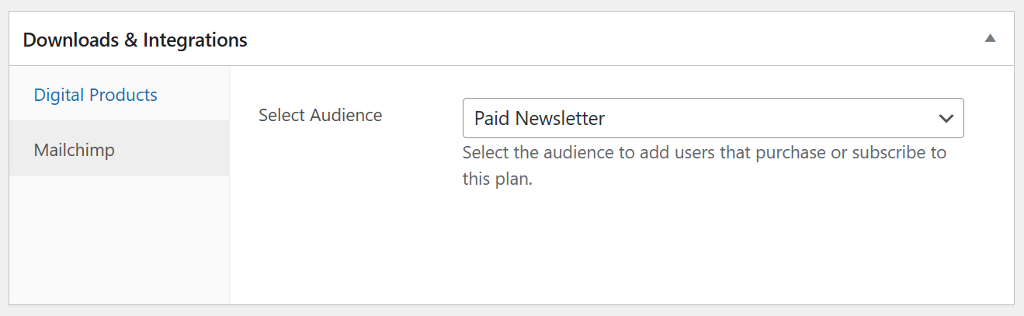
Finally, scroll down to the Downloads and Integration section and switch to the Mailchimp tab. This is where you can select the Mailchimp audience to which paid newsletter members will be added.
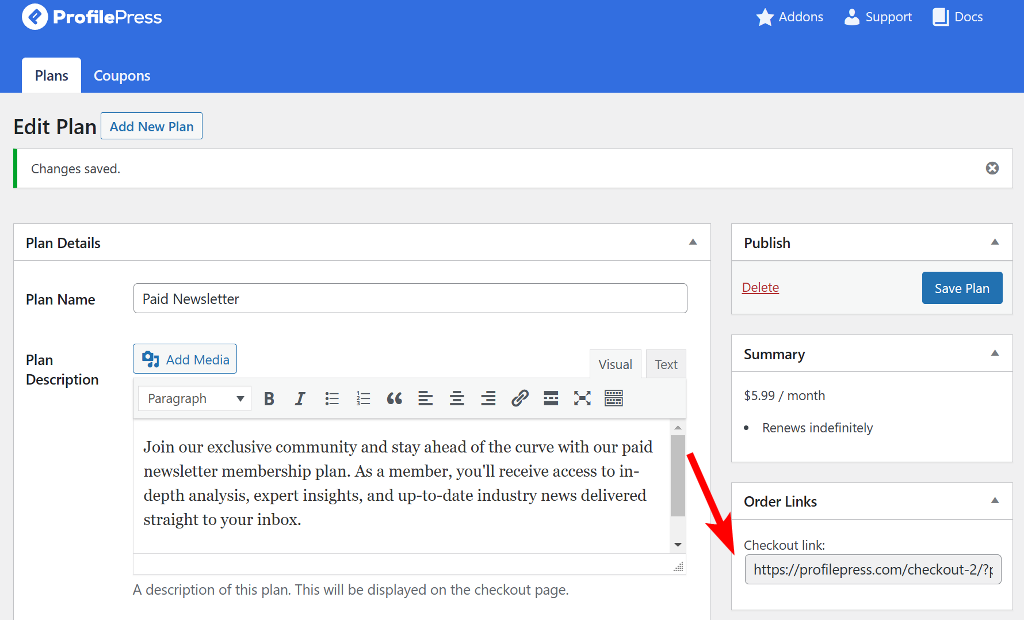
Once you’ve finished making all your changes, click the Save Plan button to publish your membership plan for your paid newsletter.
Now that our membership plan is ready let’s look at how to add it to the website so that users can easily subscribe to the plan.
Let Users Buy the Membership
Adding the membership to the website’s frontend will allow users to buy your paid newsletter subscription. After you publish your membership plan, ProfilePress generates a unique checkout link. You can add this link anywhere on the website using a button or hyperlink to allow users to purchase the paid newsletter membership plan.
The link directly takes the user to the checkout page, where they can fill out their information and complete the purchase.
The website part is complete. Let’s now look at how we’ll restrict email campaigns to these paid email subscribers.
3. Create Newsletters for the Paid Subscriber List
After a user purchases the paid newsletter subscription from the website, they’ll automatically be added to the Mailchimp audience list. And if their subscription expires, they will be removed from the Mailchimp audience of the subscribed membership plan.
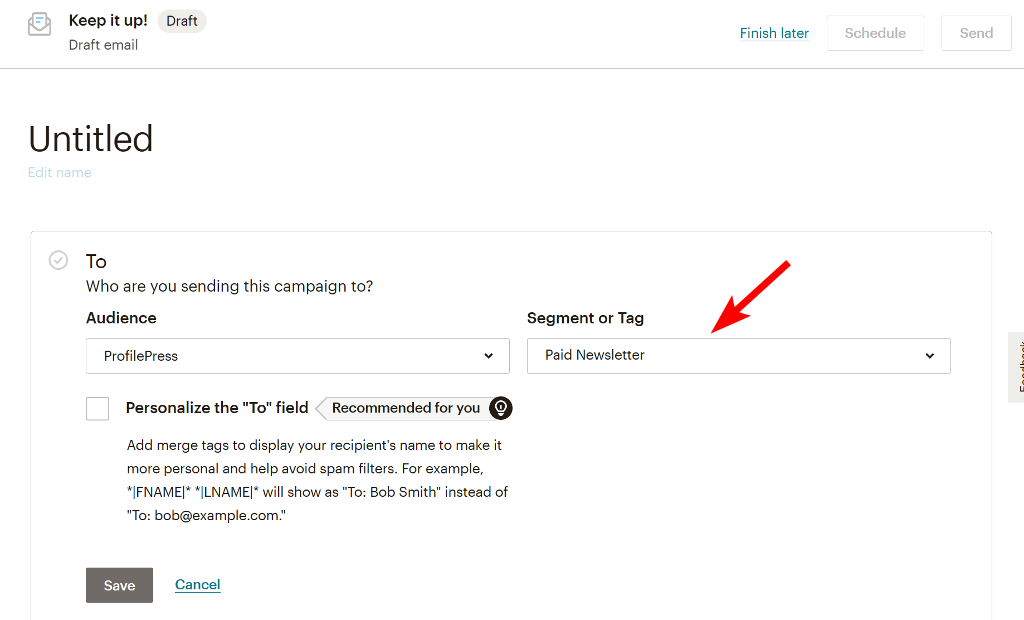
When you create a new email campaign on the Mailchimp website, select the audience and tag to whom you want to send the newsletter.
Next, write a subject line and design your email newsletter. You can refer to this link to learn more about how to create a newsletter in Mailchimp.
Once your newsletter is ready, you can publish or schedule it, and it’ll be sent to your paid newsletter membership members.
The same steps apply if you use Campaign Monitor or any of ProfilePress’s supported email marketing software.
Wrapping Up: Create Paid Newsletter in WordPress
Monetizing your newsletter and offering added value to your dedicated followers can be achieved by establishing a paid newsletter subscription through WordPress. Utilizing a plugin such as ProfilePress simplifies the process and allows for seamless integration with Mailchimp, Campaign Monitor, and any email marketing software we support now and in the future.
For bloggers, business owners, and content creators, a paid newsletter can be a valuable addition to their online presence and foster a dedicated following. By dedicating a little time and effort, you can effortlessly create a paid newsletter subscription through WordPress and start generating revenue from your content.
Get ProfilePress today!